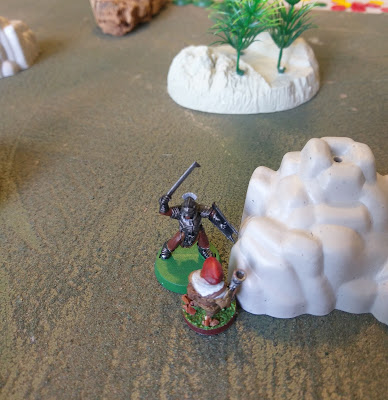
I played a couple more games of Battlesworn this morning, using the solo system from Knights and Knaves to run one of the forces. Both games featured Dwarves and Uruk Hai; I took the Dwarves in the first game and the Uruk Hai in the second.
In the first game there were a few turns where both sides used reaction moves to get their warband into positions where they could charge or intercept enemy movement. And then the fighting started ...
Neither side had any missile troops so the fighting was always going to be up close and personal. The Dwarves did have a Warmage, though, with a summon spell; you can see the resulting armoured bear (a Tank) towards the top of the picture. It proved very useful, since its proximity to two of the Uruk Hai meant that they couldn't charge into the combats happening elsewhere on the board. In Battlesworn you must charge the nearest enemy figure; this forced them to either charge the bear or move somewhere else, and activations weren't always forthcoming.
The fighting was brutal and bloody. The Uruk Hai force was strong on hard-hitting Brutes, whilst the Dwarves fielded resistant Tanks.
The game went to the time limit with neither side having won, and both sides bloodied.
In the second game I took the Uruk Hai. There were very few actions or reactions for the first couple of turns. Eventually a Dwarven musketeer moved to a point where I could charge him.
Once again, this initial combat sucked in figures from boths sides.
The fighting spread across the board, as figures trying to move towards the main part of the fight were intercepted by enemy figures trying to stop them. The preponderance of red markers shows how deadly the fighting was.
The Uruk Hai had a Berserker, who was brought into the fray to finish off wounded Dwarves. This he did very efficiently, until a combat left him exposed and he was picked off by a musketeer.
Once again the game timed out with no clear winner and lots of rather dead losers.
The warbands in the first game were:
Uruk Hai - 4 x Fighters, 1 x Leader/Brute 4 x Brutes, 1 x Berserker/Brute
Dwarves - 1 x Brute/Tank, 4 x Fighters, 4 x Tanks, 1 x Warmage/Tank. In the second game I dropped the Warmage/Tank and added 2 x Shooters.


I'm tending to think that Battlesworn (as a solo game) would be more decisive with a lower figure count, such as building to 8 or 9 slots rather than 12. However, the challenge is to win within the allotted time...
ReplyDeleteI'm finding that the Turn 7+ bidding leaves neither side with enough actions, since it tends to drive the solo side into low bids. Yes, I get a load of reactions, but these aren't any good for initiating combats of my own. This tends to make the last few turns a series of continuing melees with the odd figure moving into combat. I may just use the normal tables all of the way through.
Delete
DeleteVictor4 February 2018 at 19:14
That was mainly to mimic a real life opponent, as both players tend to bid lower towards the end. But I can see how it can be frustrating in a solo game.
There appears to be roughly a 50% chance the opponent will bid '1'. Whilst this means I can pick up tons of reactions, it gives little scope for actions.
ReplyDelete