Friday 31 October 2014

Dogger Bank - 1781

Dogger Bank was a naval action fought between the British and Dutch in 1781. A British force, under Hyde Parker escorting a convoy in the North Sea encountered an equivalent-sized Dutch force under Admiral Zoutman doing the same. The convoys fled to safety as the two fleets engaged.

Both ships had seven ships of the line, some quite small. The British ships out-gunned the Dutch, but some of their ships were old and past their best. The Dutch turned onto the port tack and waited for the British attack. The eventual fight saw both sides battered, but it was the British that broke off the action.

We refought this battle this evening to introduce the club to the 'Form Line of Battle' rules. Two of us had played before (Caesar but once) whilst the other four players were new to the game. People picked up the odd mechanisms quickly, though, and we got a good game before we had to call it a night.

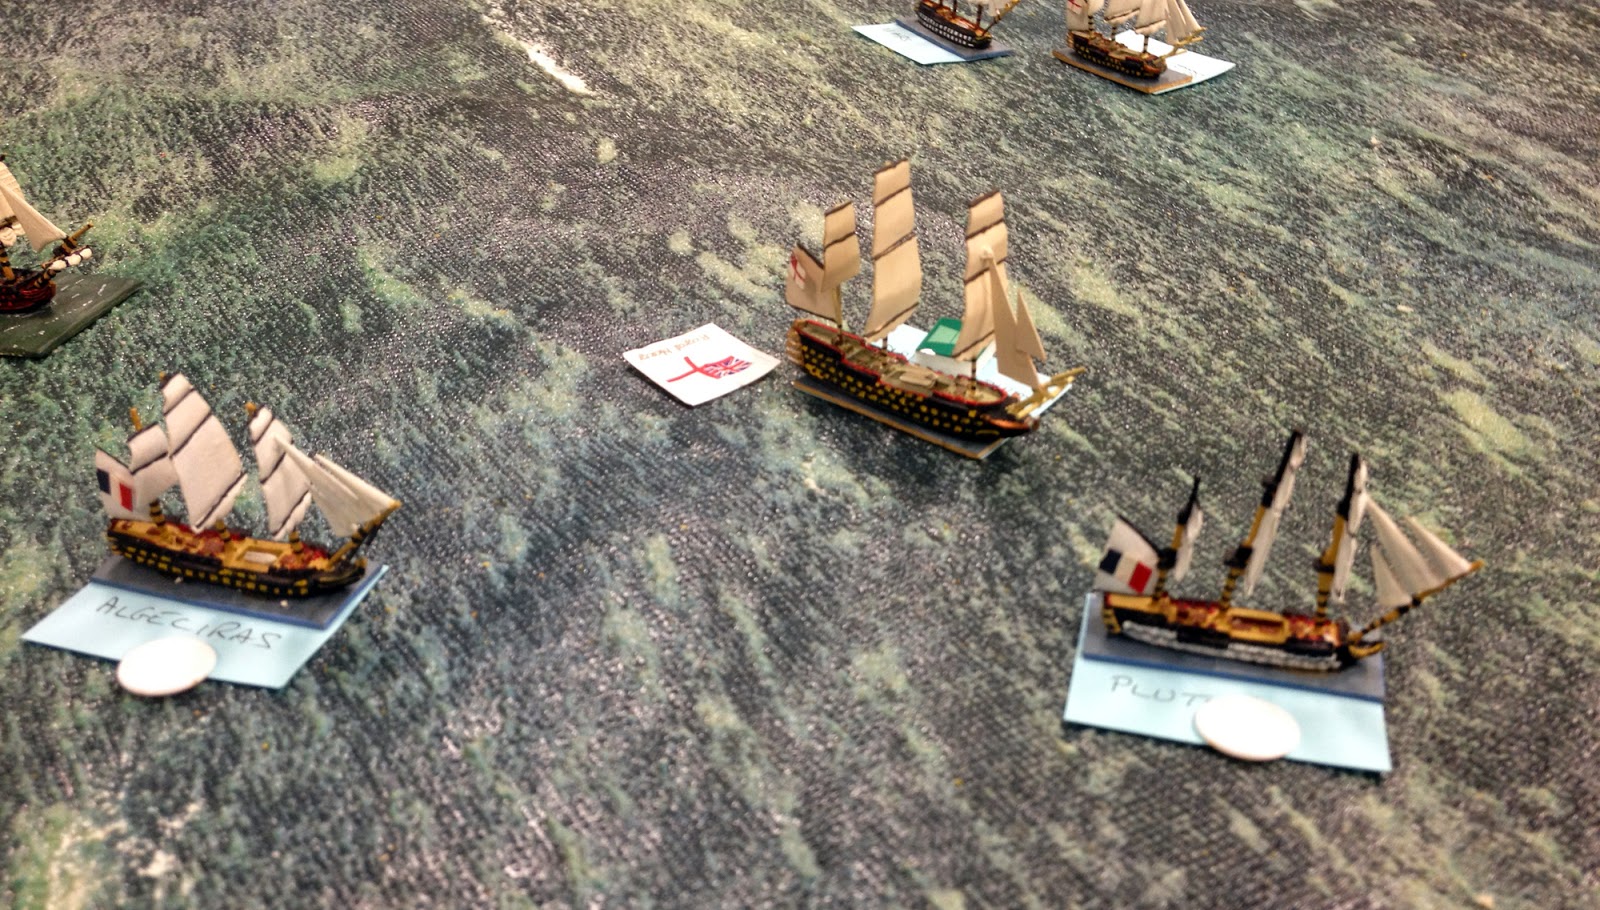
The ships at the start. In the foreground are the Dutch: Erfprins (56), Admiraal Generaal (74), Argo (44), Batavier (56), Admiraal de Ruijter (68), Admiral Piet Hein (56), Holland (64). Beyond them are the British: Berwick (74), Dolphin (44), Buffalo (60), Fortitude (74), Princess Amelia (80), Preston (50), Bienfaisant (64)


A view of the British line from the lead Dutch ship.


The British approached in line astern, but switched to line abreast in order to bear down more rapidly on the Dutch and to cut their line in several places. This was where the Princess Amelia caused issues; it was an old-school 80-gun three-decker and as well as being under-gunned for its size it didn't turn as well as the rest of the British ships.


Erfprins opens fire at long range, but scores no damage.


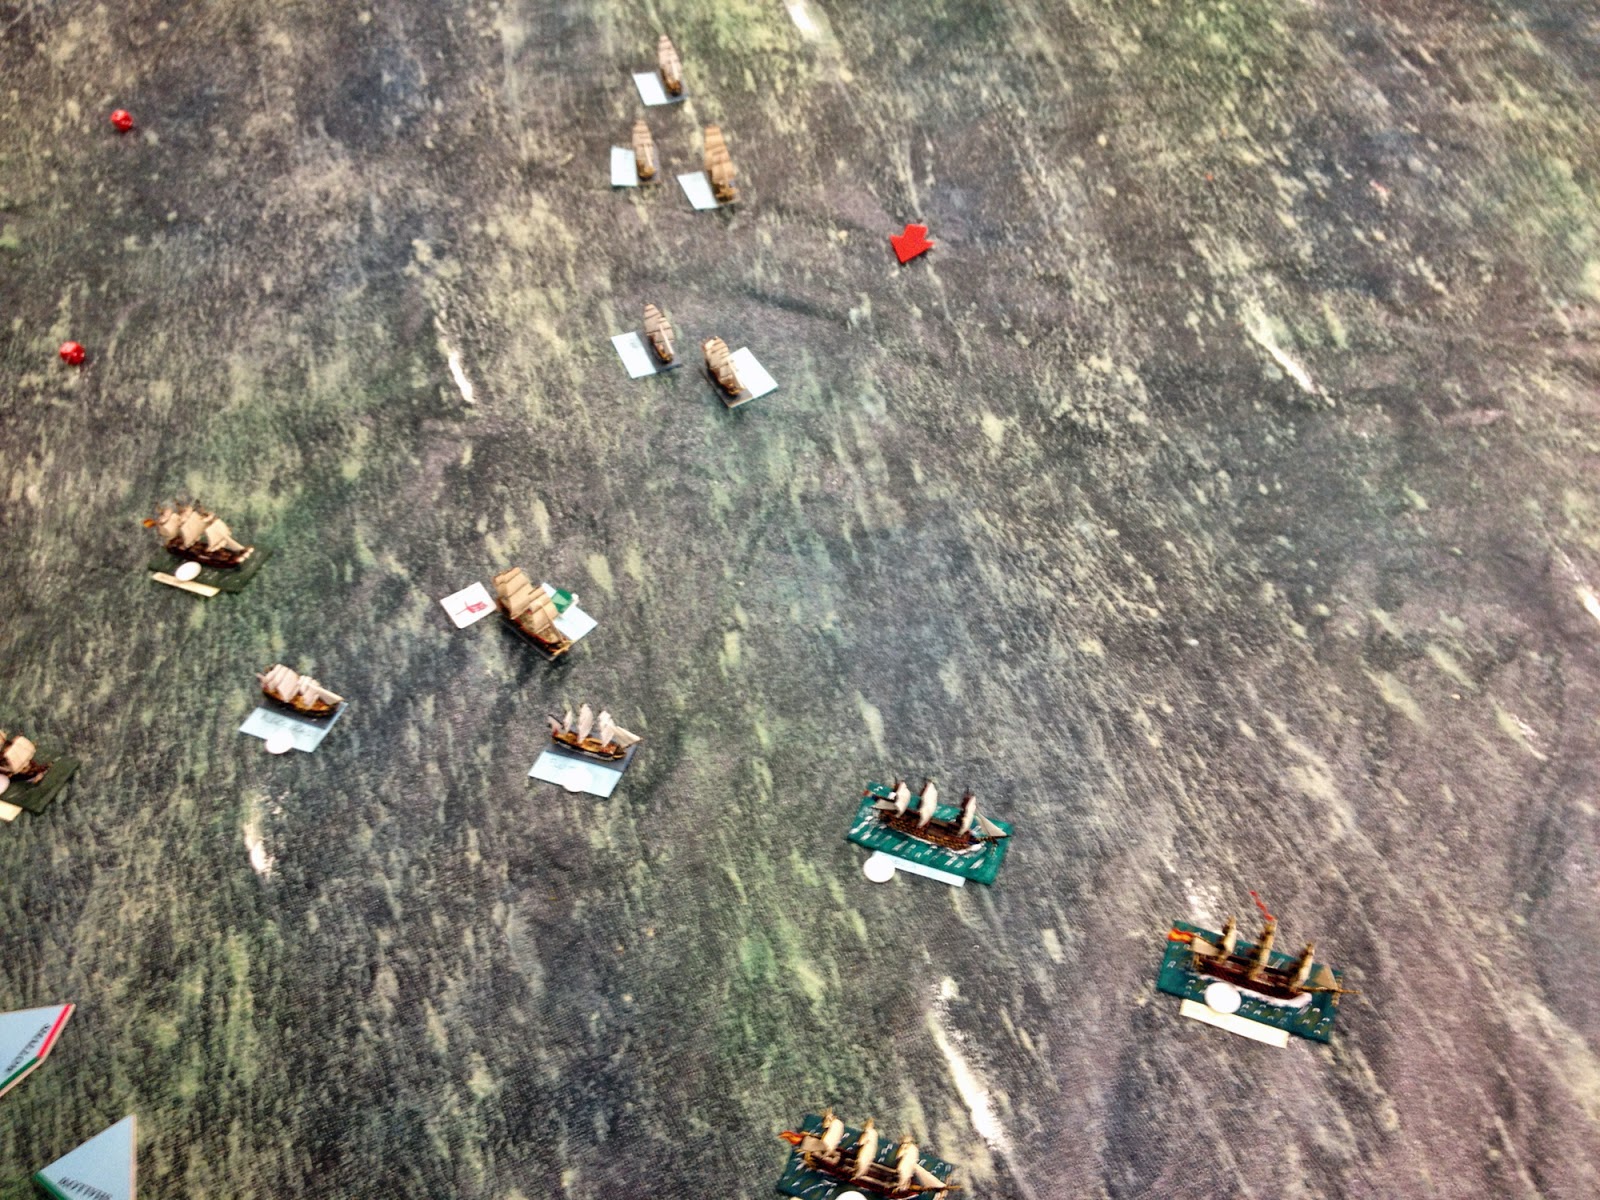
The British cut the Dutch line, Berwick in the lead.


The British open fire, damaging the Admiraal Generaal


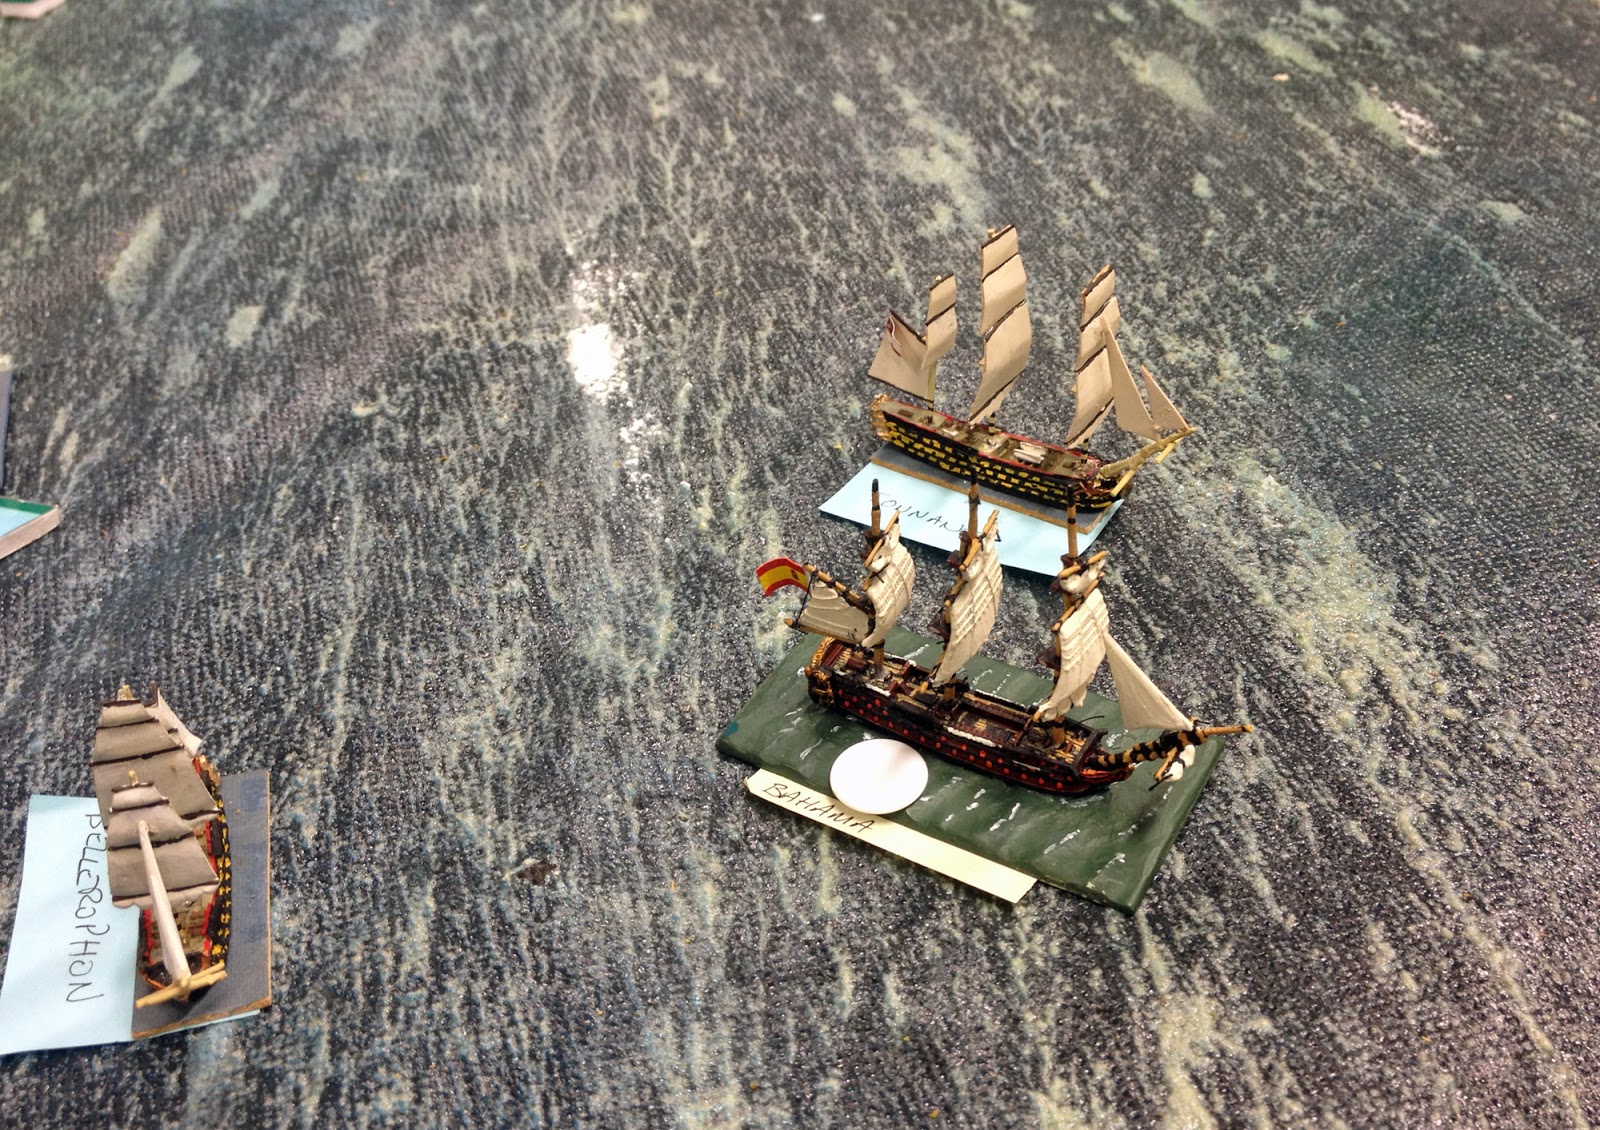
A fierce fight broke out at the head of the Dutch line, which saw the Argo strike and the Berwick heavily smashed about. About half of the ships were sucked into this area.


The Princess Amelia was engaged by both the Admiraal de Ruijter and the Admiraal Piet Hein. A broadside from the former ship holed her below the waterline at one stage.


As time ran out, Bryan decided to get in close, and the crew of the Princess Amelia attempted to board the Admiraal Piet Hein. In a fierce melee, however, it was the Dutch who were victorious, forcing the British ship to strike.


At that point we prety much had to end the game. Most of the ships were engaged by the end of the evening, and some had taken reasonable amounts of damage. The Berwick was in a bad way, whilst the Princess Amelia had been captured. The Dutch had lost the Argo, but as their smallest ship she was no real loss. On the whole things were looking good for the Dutch.

After initial reservations about FLOB's odd turn sequence and random movement, people seemed to enjoy the game and pick up the mechanisms fairly quickly

Meanwhile, on the other table, we had moved forward 500 years to see ships battling in space - Geoff and Peter were playing Full Thrust:


Sunday 26 October 2014

The Battle of Flamborough Head

In the wake (did you see what I did there) of Thursday's 'Trafalgar' game, I found myself volunteering to run a game of 'Form Line of Battle' next week. Now, as much as I like FLOB I have, in fact, only played a couple of games of it in the last few years so I am, quite frankly, a bit out of practice. This afternoon I decided to set up a game so I could get used to the mechanisms again.

I chose the Battle of Flamborough Head, in which US naval hero John Paul Jones, in the converted merchant vessel Bonhomme Richard, and in company with a couple of French frigates, Alliance and Pallas, attacked a British convoy in the North Sea. The convoy was escorted by the 44-gun Serapis and the 20-gun hired vessel Countess of Scarborough. In a fierce fight, which saw the Bonhomme Richard pounded until she was sinking, Jones attacked and boarded the Serapis, forcing it to strike and giving him the victory. Meanwhile the Pallas engaged and defeated the Countess of Scarborough. The Alliance, according to all reports, sailed around the action firing on friend and foe alike.

This made for a simple scenario. The Bonhomme Richard and Serapis are both rated as Inferior 4th Rate Ships of the Line, whilst the Alliance is rated as an Inferior 5th Rate Frigate. I ignored the action between the Pallas and the Countess of Scarborough, although might include them in a later refight. I gave the two main ships Veteran crews, whilst that of the Alliance was Experienced. Captains were Average, except John Paul Jones who was rated as Inspired.

I set up all three ships running before the wind, with the Bonhomme Richard and Serapis at long cannon shot, and the Alliance some way behind them, midway between the two vessels. The Alliance would be controlled by whoever got the first action in the turn, so would change sides randomly.

The Serapis and Bonhomme Richard at the start. Whilst I have a model of the Bonhomme Richard, it's not painted, so a Dutch vessel acted as a proxy.


They edge towards each other, closing the range, whilst the Alliance moves into view as well.


The Serapis opens fire!


The Bonhomme Richard opens fire as well, trying to rake the Serapis.


Even the Alliance joins in, firing on the Serapis at long range


The wind dropped at this stage, slowing all vessels. Bonhomme Richard raked the Serapis.


But Jones misjudged the turn, and the Serapis cut in under his stern.


A raking broadside from the British causes massive damage to Jones's vessel.


And worse was to come. The wind, already light, dropped to a calm, with the Serapis neatly lined up at the rear of the Bonhomme Richard. 


Fortunately the British shooting wasn't as accurate as that first broadside, and whilst the Bonhomme Richard took more damage it wasn't critical. I had started to look up the rules for lowering boats and towing a ship, when the Bonhomme Richard picked up a stray breeze and was able to manuever out of peril. The two ships continued to exchange fire, but Jones was still getting the worst of it.


The positions were reversed; the Serapis attempted a bow rake ...


... but the wind picked up enough for the ships to move again, and Jones managed to get in a stern rake of his own. However damage left his broadside weak and ineffective.


The ships slowly circled each other in the light breeze, continually shooting. Both were taking damage, but if the exchange continued it would be the Bonhomme Richard that would strike first.

However the Alliance had been creeping closer to the action, and in a sudden burst of movement passed aft of the Serapis and fired a deadly broadside into her stern.


Lots of damage. And a morale test. Which the Serapis failed. The British ship hauled down its flag.

The battle was heavily influenced by the wind dropping to almost nothing at a key point, giving the British a real advantage in in the one-on-one fight. This was offset by John Paul Jones getting the initiative for several turns in a row, allowing the Alliance to come to his aid once the wind picked up again.

Meanwhile, at the other end of the table, my assistant was playing out the fight between the Pallas and the Countess of Scarborough. 


When I asked her who'd won, she just said 'Tweet!'

Hang On Lads! I've Got A Great Idea

Last week a well-spent $2 got me another vehicle of gun-toting doom to take onto the post-apocalypse roads of Unanderra!


However I otherwise paint it, that Union Flag is staying on the roof.

Here it is with the other vehicles I currently have in my 'to paint' pile.


Some of the other vehicles ...

Friday 24 October 2014

Frocktober!

This is a wargames blog. I don't generally post stuff here that doesn't have some kind of game-related content. But I'm going to make an exception for this post about - Frocktober!

Every ten hours, one woman in Australia dies from ovarian cancer.

Ovarian cancer is an insidious disease, often known as a “silent-killer” as symptoms are vague and often strike without warning. Unlike many other cancers there is no early detection test. Consequently ovarian cancer is often diagnosed in its late stages and only 20%-30% of women will survive beyond five years of diagnosis. In comparison, survival rates increase to 80-100% when ovarian cancer is detected and treated early.

The Ovarian Cancer Research Foundation is Australia’s pre-eminent ovarian cancer research body. Their goal is to raise ovarian cancer awareness and vital funds for the development of an early detection test that will save women’s lives.

They receive no government funding and rely on the support of community and business supporters to assist in driving their research forward.

Frocktober is all about raising funds and awareness. You can wear a frock just once, or do what many are doing and wear a different frock every day in October. In doing do we can help support the OCRF.

Last week I had an opportunity to pop on a frock, flounce in front of a camera and do my bit. I don't have a specific page set up, but I have been promoting and supporting fellow blogger Kim-Marie and her Team Kimba Likes. If you want to contribute just visit this site:


Thank you.

And here's the photo:


As for the technical details,  the lovely Rachel is today wearing a brown and turquoise dress from La Redoute, teamed with high-heeled boots from Rubi Shoes. She is posing in the E.G.Waterhouse National Camellia Gardens in Caringbah, Sydney. The picture was one of many taken by my long-suffering wife.

And my arms really are that skinny.

Trafalgar!

It's not often you fight an action where the name of the rules and the name of the battle are the same, but that's what we did tonight, two days after the 209th anniversary of Trafalgar. And we used the 'Trafalgar' rules.

To be fair, we didn't fight the whole battle. Ralph devised a scenario which pitted the lead ships of Collingwood's column against the Allied ships they were matched against in the actual battle. It can be assumed that other ships were around; we just focused on a subset of the ones present.

Both sides had six ships. Peter and mark took the British, whilst I took the Allies. Ralph umpired and Dave watched. Caesar wasn't there, as he's spent the last three weeks building the chicken-coop to end all chicken-coops.

Here's the Allied ships. Their objective was to get more ships off the end of the table (where Dave is sat) than they lost to the Royal Navy.


Here comes the Royal Navy.


The Royal Sovereign engages two Allied vessels. Being ahead of the rest of the British line, the Royal Sovereign took a fair amount of fire and was rapidly dismasted by surprisingly accurate French and Spanish gunnery.


A long-view of the game. With the objective to get ships to safety I didn't hang around and fight the British; I piled on sail and ran for the edge, reasoning that the bulk of my ships could escape unengaged, thus fulfilling the victory conditions.


The Royal Navy gave chase, but with no speed advantage were never going to be able to do much.


Two ships didn't make it. The French Algeciras lost a couple of masts, and was given a right pounding ...


... but not as much as the Spanish Bahamas, which was a shattered wreck by the end of the game.


The Royal Sovereign was knocked out of the fight early on, but otherwise most of the British ships took relatively little damage. However the action was about the Allied ships escaping to Cadiz, not destroying the Royal Navy so for me this wasn't an issue.

I'm still not sure about 'Trafalgar' as a game, but I can't quite put my finger on what the issue is. Possibly it's that the rules I've mostly played ('Hearts of Oak' and 'Form Line of Battle' tend to keep they gunnery rules fairly simple, and concentrate their efforts on the sailing and management of the vessels, whereas 'Trafalgar' is the other way around with simple sailing rules and a more involved firing process. I'm also not really sure that the firing mechanisms emphasise differences between ships of different sizes or, it has to be said, crew quality. Perhaps I need to organise a game of 'Form Line of Battle' fairly soon, so we can do a comparison whilst this game is still fresh in or minds.

Tuesday 21 October 2014

Running With Scissors

I painted a new gladiator today - so new that he doesn't even have a name yet.

Victor and I are always trying out new ideas for Munera Sine Missioner, and Victor recently came up with some ideas for the Arbelas gladiator type - he of the cone and blade in his left hand. My rules for the cone were pretty simplistic, and Victor wanted to try something more interesting. We also felt that the same mechanisms could be applied to the twin-bladed scissor sword which may or may not have existed. Victor had a couple of these weapons, converted one of his gladiators to wield it and gave me his spare.

I added it to an old Black Tree figure I had which I'd never painted because (i) he's lost his sword and hand in a horrible accident and (ii) the pose was awkward and bizarre, and I didn't like it. But a spare figure is a spare figure, and a new Milliput hand covered up the small piece of wire I used to attack the scissor sword to the arm.

So here he is - the Scissor.


And here's the old Gladiator Miniatures 'Contra-Retiarius' who now gets called an Arbelas, because it sounds better.


Victor's rules for these weapons assume that they were used to parry, but only longer, slower weapons. Both the Cone and he Scissor have the Parry trait. This allows the gladiator to attempt to disarm their opponent. When they are attacked by an unwieldy weapon which is attacking at two or more hexes, and does not have the Ranged trait, a parry attempt may be declared. Roll a D6, and apply the Attacker's attack modifier to the roll.

A score of 3 or less means that the Attackers attack is blocked and that they drop their weapon into a random adjacent hex.

A score of 4 or 5 has no effect, and the attack is now resolved.

A score of 6 or more means that the attack is resolved, but that the Attacker now gets an additional +1 as the Defender's failed parry attempt has left their guard wide open.

(The Attacker's modifiers make a lot of difference to this roll. I am inclined to treat an unmodified 1 as a 1 and an unmodified 6 as a 6, and only apply modifiers to rolls of 2-5. In that way there's always a chance of parrying and always a chance for the Attacker to get a bonus.)

Reading the rules, you will see that the weapons this trait can counter are the long spear, the trident, the net and the lasso.

The Cone is also treated in all other respects as a small shield. The Scissor is treated as a sword, but always counts as disadvantaged.

The Arbelas and Scissor make interesting opponents for the Retiarius and/or Hoplomachus types.


Sunday 19 October 2014

The Pons

I thought I'd try something a little different with my gladiators today. I say today, but I've been planning and executing it during the week, and just played it out today.

I made a Pons.

This is a wooden bridge structure, on which a Retiarus would stand, to be faced by two Secutor type gladiators. As well as his net and trident the Retiarius had a pile of stones he could use to fend off his opponents.

I staged this to see what the setup looked like. Nice, huh? It's made from card and matchsticks.


Then I played a game. I used Munera Sine Missione v2.3, of course.

The Pons consists of five hexes in a row. The three in the middle are the Pons proper, and on each end are the ramps. The Pons is two levels above the floor os the arena, whilst the ramps are one level. A gladiator can attack from or onto the Pons, but if they are on a lower level they subtract the difference in levels from their attack roll, and if on a higher level they add the difference. So a Secutor in the arena attacking the Retiarus on the Pons would suffer a -2, whilst the Retiarius fights back at a +2

The Retiarius must remain on the Pons, so cannot be pushed back. There's a small rule change which helps this, which I'll cover later.

The Pons can only be entered through the two hexsides at each ens of the ramps. It costs +1AP to move from the arena onto a ramp, or from a ramp onto the Pons.

The Retiarius has an unlimited supply of fist-sized rocks. These are a ranged attack (4 hexes), but count as disadvantaged (double disadvantaged at 3 or 4 hexes).

I pitted Cupido the Retiarius, against Hero (in the green loincloth) and Ostorius (in red).

Ostorius charged straight in, trying to hold Cupido in combat whilst Hero moved into position. He managed to wound Cupido, but the Retiarus's height advantage soon began to tell.


Hero reached the end of the Pons.


He charged up the ramp and attacked Cupido, who was still engaged by Ostorius.


A single trident thrust finished off Ostorius, and Cupido turned to face Hero.


Hero drove the Retiarius back, dodging the swinging net.


A single sword thrust, and Cupido went down.


I need to play this out again a few times to sort out the balance. I really started the Secutors too close to the Pons - Ostorius reached it on his first turn, and that pretty much held Cupido in place before he could really do anything to prevent it.

In terms of optional rules, I can't see the referee working with this setup (unless he's forbidden from being positioned on the Pons itself), but I did use Working The Crowd.

As for the rule change, it's something more general I'm looking at in order to fix a small bug in the game. Ordinarily, if you miss a gladiator, they jump back one hex. If they can't do so, because of another gladiator, the arena wall, or being on a Pons, they are knocked over. If they are knocked over whilst down, then they are beaten. So if you back a gladiator against the arena wall, your best strategy is to use weak attacks that won't hit, so the misses knock him down once, then twice.

The fix is that a gladiator that can't jump back, doesn't. However if they are attacked from a position where a jump back isn't possible, then the attacker gets a +1. If you can't effectively dodge, then you are easier to hit. I will work this change into the next release of the rules.

Related Posts Plugin for WordPress, Blogger...